Tuesday, 31 December 2013

Upgrade Progress - final post of 2013

So the upgrades are taking their time but the weather hasn't been too good so no significant loss of drive time.

First of all the clutch - fundamentally 2 primary options for most Ford engine/gearbox combinations 220mm and 240m both with a 23 spline.  The original blacktop had a 240mm and the TTV light weight flywheel needs a 220mm, I could have returned the flywheel as there is a 2.0L blacktop version which would allow retention of the 240mm clutch but it's heavier than the 1.8L one I've got so I decided to keep it.  £80 bought a 220mm clutch but I could only get one for a MT75 gearbox which meant that I needed to get a new Release Bearing.  Basically needed a CCT132 rather than the CCT133 that was originally fitted to give an extra ~10mm of clearance unfortunately modern auto factors struggle with part numbers so it took a couple of goes (and ~£20) to get the right one - so now have the original CCT133,  a CCT134 as fitted to an Escort Mk1 (right offset but too small inner diameter), an MT75 one and the CCT132 (RS2000) that is now fitted to the car.  Still on the positive side I now know a lot more about clutches and how to measure offsets and have a clutch capable of supporting 220+ bhp so more than I reasonably expect to get out of the engine.

Christmas turned out too busy to allow any progress on returning the engine to the car but the Dorset WSCC Christmas Dinner was a real success with all who attended seeming to enjoy themselves - many thanks to Malcolm for all his efforts.

Myles and I fitted the flywheel (using ARP bolts) and clutch to the engine the release bearing to the gearbox just before Christmas but the garage was too cold and we had too much to do to make any really progress with the engine refit.

Weighed new flywheel at 3.7kgs versus 9.7kgs of the original Ford item.
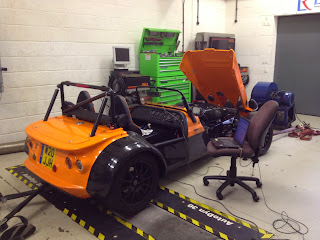
With Christmas over and constant rain keeping temperatures in double figures James and I ventured into the garage.  First task was to replace the sump gasket, fairly straight forward and we did an oil change while we were at it.  Next we removed the engine mounts and made the finally preparation for reinstalling the engine. The actual installation was straight forward but we needed to jack up the gearbox bell housing as the gearbox mount is well forward and the only thing that holds up the bell housing is the engine.  Once the engine and gearbox were mated and bolted together and the engine mounts refitted the rest of the installation was a repeat of the original built with the only minor difference was significantly less access as the bodywork was now fitted especially for reconnecting the throttle cable - luckily Myles has long skinny fingers.


Fitting the new radiator presented a small problem with the temperature switch being in a slightly different place. James marked and cut out the fan mount to provide the clearance and we fitted the radiator.


Finally we fitted the new carbon fibre exhaust but will need to manufacture a rear bracket for it as the one from the original exhaust isn't suitable and I need to keep it for MOTs.

Once we'd checked everything was connected we started the engine and bled the cooling system - no leaks so far!

Just need to refit the front ARB, do the final torque checks and then wait for some decent weather in 2014.

Saturday, 7 December 2013

Upgraditis Strikes Again

Thursday night was Dorset WSCC night with only Colin braving the winter night in his Westfield. Chris' car is half way through an engine transplant replacing the silver top zetec with a blacktop and transferring over all the Raceline/TTV goodies.  Not many have SORN'd and we discussed a blat call up list if there's good weather over the coming weekends.

The WSCC night spurred me into action so when I got home from work on Friday I prep'd the car for engine removal with only the Alternator and fuel connects left to removed before the lift.  The plan is to:

  • Replace the sump gasket to stop the slight oil weep post ARP con rod bolt installation.
  • Fit the TTV light weight fly wheel inc ARP bolts
  • Fit the Radtec Alloy Radiator
  • Fit the Carbon Fibre Exhaust
  • Adjust the ARB to it's softest setting and investigate/replace the bent drop link rose joints
  • Refit front Mintex M1144 disc pads with ceratec grease in an attempt to cut down squeal.

Plus carry out an oils change and full service

I've decided not to fit the LSD yet as if I'm removing all the rear body work I also want to fit a rear ARB and nylon bushes that I've just ordered from Westfield.  Overall I want to drive the car next year, with plenty of track days to really get to know it before spending anymore money on it (possibly wishful thinking!)


James and I went out to the garage and he disconnected the alternator and fuel lines, removed the radiator and checked to make sure everything was ready to remove the engine.  We discussed the clearance from the ARB at the front of the engine and agreed that there was enough (wrong!).  After a quick clean up we setup the engine hoist and connected the leveller.  The lift initially went well with the engine and gearbox separating but then the flywheel and clutch were bigger than the gap between the front of the engine and ARB so the ARB had to be removed with the engine suspended on the hoist.  Once the ARB was out the engine lift was completed and the engine set down on a work table.

With the engine out we decided to replace the flywheel first.  James removed the 6 bolts holding on the clutch and after a slight tussle with a sticking dowel the flywheel was exposed.  The first attempt to remove the flywheel bolts failed as we could get enough leverage between the front main crankshaft and the flywheel bolt.  After a quick rethink James placed an allen key through one of the gearbox mounting bolt holes and braced a large flat bladed screwdriver in the starter motor drive ring and it worked very well.


Disaster - original clutch was too big for the new flywheel.  After an exchange of texts with Malcolm I had two options - 1) swap the flywheel 2) buy a pinto 220mm clutch.  unfortunately ECP didn't have a pinto clutch in stock but will have one on Monday so a tidy up of the garage and the end of work for the weekend. 
 

Wednesday, 6 November 2013

Cam Swing and Shift Light


Lots of activity since the last post, Omex posted out the ECU connector pin already made up with the wire and seal and after popping off the connector locking mechanism it was a straight forward fit.  By the time I'd finished it was dark but I decided to go for a drive and test it and when it went of it was very bright indeed - unfortunately no dim capability on headlights but in reality I won't be routinely hitting 6,500 rpm in the dark.
 
 James and I fitted new iridium spark plugs - original ford ones were platinum and in perfect condition!  We also fitted 10mm HT leads - unfortunately they weren't quite right and after a call to the supplier they confirmed that they'd been made using the Gen 3 plug boots and not the Gen 1s they should have been - another set are in the post.

Off to NMS for the cam swing and rolling road session.  The cam swing took an hour to complete and then the car was run up on the rolling road. The cam swing had found and extra 4.6 bhp and also increased torque across the whole rev range not the most that Troy had ever achieved but still a healthy improvement. 


Troy tried removing the air filter and it made no difference which was good but having to run with the bonnet fully down to get air to the radiator meant that we could check the affect of feeding cold air to the TBs.  After a discussion Troy suggested I try to look at a way to get cold air fed to the TBs and also consider improving the exhaust before investing engine changes like cams and porting.  He also suggested a lightened flywheel and changes to the gearbox ratios might be worth considering. 

A discussion with the WSCCers at the Exeter Kit Car Show (not as good as last year and no Westfield drifting!) had suggested TTV Racing as an excellent supplier of machined flywheels and after contacting them I discovered they were based close to Wattisham so I ordered one for pick up next time I'm over in Suffolk in mid November.  I also order some plastic conduit and a plastic scoop to try out some options for getting cold air to the TBs.  Now I just need some time to get into the garage!

Saturday, 19 October 2013

Happy Birthday

This week saw the 1st anniversary of the car being registered, after a week of rain the forecast for the morning was clear with rain starting around mid-day.  Unfortunately this was wrong and I got soaked dropping Allanah of to dancing!  With the rest of the day forecast as rain showers I decided to fit the shift light.  After isolating the battery James drilled the 14mm hole for the LED under the T lights on the dash and installed it.  With the dash removed I dropped the ECU panel and loosened all the looms so that I could access the back of the main OMEX600 connector.  The shift light is pin B8 and it works by providing the earth through the ECU.  Unfortunately the B8 only had a seal fitted and the kit didn't include the connector pin so I had to down tools.  Myles wanted to investigate the noise from the pedal box so we removed the cover and he operated the pedals while I looked and listen,  there was no obvious problem but the noise of the clutch pedal hitting the end stop seem to replicate the noise so hopefully nothing to worry about.

In order to prepare for the next rolling road session at NMS I've ordered a set of 10mm racing HT leads and NGK Iridium spark plugs.  The supplier Formula Power were recommended by an Aston Martin owning colleague as he'd heard about them through his owners club.  Not much cheaper than the well known Magnecor 8.5mm so they better be good! - also available in blue rather than the Magnecors that  are only available in red.  I also saw that another WSCC member, Darve, who has just successfully IVA'd his MX5 SDV had completed some head work, change his cams and them got NMS to map his car and achieved an additional 25 bhp, perhaps something for next winter.  The WSCC Forum posts went on to discuss fuel for RR sessions.  When I can I use Tesco's Momentum which is 99 octane rather than the normal 95 but the WSCC Forum recommendation was Shell V-power, last time I was at NMS I filled up at the Total (I think) garage on Towcester Rd just round the corner from them.  Logic tells me that you should use what ever you normally fill the car with for a RR if you want to get a realistic result.

I exchanged emails with Paul and Joe Bromley during the week and they've decided to sell their Westfield due to a combination of: limited suitable roads on the IoM, lack of WSCC social side, lack of time all resulting in only 500 miles driven in the first year of ownership - car is now on ebay http://www.ebay.co.uk/itm/Westfield-FW-Special-Edition-Zetec-kit-car-/290997422217?pt=Automobiles_UK&hash=item43c0cc4889 an awesome car offered for sale a substantially less than build price, someone will get a bargain; there's a link on the RHS of my blog to their build blog if more evidence is required.

Saturday, 12 October 2013

Front ARB Brace

Whilst at Northampton Motorsports Chris told me that Westfield had designed a chassis brace to link between the two ARB bell cranks to address an issue with chassis cracking due to the stiffness of the ARB. I phoned Westfield when I got home and they had them in stock.  £31 later the brace arrived in the post the next day - excellent service. 
Brace in place


After dropping Allanah off for dance the weather was miserable so Myles and I went to the garage to fit the brace.  Luckily it looked like the bell cranks would unbolt without having to disconnect the ARB.  After the bell cranks had been unbolted from the upper wishbone and the brace had been fettled a little, everything was bolted back together, minus a washer, and the job was done.


Myles torqueing up the upper wishbone bolt


I'd spoken to Troy at NMS during the week about the cam swing and the car is now booked back in for the end of the month for it to be done and the engine remapped.  Even with the Cat in the exhaust I'm hoping for another 5 bhp with no loss of torque.

I've been monitoring the ongoing debate on the WSCC forum with regards cooling.  On track days I've been limiting myself to about 8-9 laps; 1st lap to warm everything up and last to cool everything down and once on the flying laps the coolant temperature rises to >100 deg C.  The original debate was around ducting but now is on the capability of the radiator and merit of the Radtec Alloy Radiator - possible next upgrade?

Friday, 4 October 2013

Northampton Motorsports - Rolling Road and Geo Setup

The weather forecast wasn't looking too good, so I put the 1/2 hood on and set off for Northampton at 05:30.  Just after passing Thruxton I stopped for fuel at Buck Services on the A303 then headed up the A34, on to the M40 for a couple of miles before turning off onto the A43 and the final 30 miles or so to Northampton, going past Silverstone and the back of our old house at Towcester.  I arrived at NMS at just after 08:00 and then went and refilled with fuel at the garage just down the road.

The first job was Corner Weighting and my first decision to make was 1) driver only or 2) driver and passenger?  After a brief discussion on the pros and cons I decided to do driver only on the basis that Corner Weighting was over kill for a road car so mainly for track days, so better to accept any compromise on the road.  Chris disconnect the front ARB, checked the tyre pressures and each of the wheels - n/s rear had play in the wishbone bushes which he tightened (need to watch them) then onto the scales - car, full tank of fuel and me - 725 kgs ouch! 


At the IVA they recorded 675 kgs which included a 75kgs allowance for the driver and perhaps only 3/4 of a tank of fuel (last minute leak and dodgy gauge) so the inboard ARB is heavy! The car was reasonably well balance already and Chris made the final adjustments to the rear shock absorbers and confirmed the ride height was 35 mm nose down which was in the middle of the 25 - 45mm range that he recommended for a fast road/track set up.


Next came the Tracking and again nothing drastically wrong especially given that the ballasting for the driver first time was  a tad underestimated and I'd swapped out the steering rack a couple of weeks ago using tape on the garage floor to transfer the distance between the track rod ends.  Second decision was to keep with the fast road/track day setup so slightly more camber on the front and not so much toe-in. 


The final thing was reconnecting the front ARB, this took a reasonable amount of time as Chris wanted to ensure that it had free movement throughout the full wishbone articulation to minimise the chassis issues that have been experienced by some. 

His final advice was to fit the cross chassis brace that Westfield now make to help with the chassis issues and a rear ARB to complement the front - the brace was in stock at WF so now ordered at a cost ~£27+P&P.

After a very lightweight - diet started already - lunch the car was strapped to the rolling road, lambda sensor replaced with the rolling road one and Troy started to work his magic.  First was a check of the throttle and the pedal stop needed adjusting to allow a full WOT to be achieved.  Then the TB balance and he was happy that, after my numerous attempts, they were balanced.  Once the oil and coolant had been checked, Troy confirmed I was happy to use the full engine rev range and then he was off.


After a run with the original map he saved it and loaded his own base line map.  The first few runs established the full throttle performance and after some adjustment of both the fuel and ignition maps the power runs were completed 166.7 bhp @ 6,700 rpm and 143 ftlb @ 5,400 rpm.  Slightly lower bhp than I'd hoped for but the torque was smooth and above 125 ftlb from 2,700 to 7,000 which should make for very driveable.


Troy then moved on to the full mapping adjusting both the fuel and ignition maps plus a whole series of other adjustments.  Once he'd done the individuals stop points he then used the 3D graphs to make final adjustments - the speed at which this was done and attention to detail was amazing to watch.  After some final test runs Troy declared that he was happy and the final map was saved and the ECU updated.

It was now 14:30 and I discovered that it was now raining.  After paying the bill and getting some stickers for the car I head off in the rain back to Yeovil.

I immediately spotted that the speedo wasn't working a remembered that Chris had found and fixed some play in the o/s steering arm so I pulled into a layby on the A43, quickly adjusted the sensor and  re-tightened up the caphead screw then got back on the road.  By now the rain had stopped but the roads were still greasy so I took it very easy.  My initial impressions on the mapping were wow - the car was so torquey and smooth.  The flat spots in the low to mid rev ranges were non-existent and the engine even seemed to rev much more quickly.  On the ride the benefits weren't so clear but as the journey progressed the roads began to dry out and I began to push a little harder (although never above the speed limit, honestly officer) by the time I got to Yeovil I was convinced that I could feel the difference and it was that the ride somehow smoother and the steering more precise.

After a bite to eat at home I headed off to the WSCC meeting just outside Dorchester armed with my pack of printouts and had a very enjoyable evening comparing notes on the visit to NMS and enduring the banter "only 166 bhp on TBs got more from my 1800 on Webbers" etc etc - on the drive home I was now convinced that the car was transformed - but I was now very tired and needed my bed!

Wednesday, 18 September 2013

Quick Rack and Track Day

 Look no steering rack!

The new quick steering rack arrived in the post during the week and I decided to fit it ready for the track day on Monday and trip to Northampton Motorsports booked for the beginning of Oct.  The first job was to remove the old rack, straight forward enough, once up on axle stands, just crack off the track rod ends from the steering arms and the unbolt the mounts.  The rack was then just fed out through the o/s lower wishbone.


Having confirmed that the new rack was a direct replacement and measured the length track rod to rack rod James cut off 10mm from the ends of the new rack and removed (one needed WD40, heat and clamping the whole arm in a vice plus a mallet and verbal assistance to shift it) the extensions from the old rack and fitted them to the new setting the overall length to that measure earlier. Then rack was fitted and torqued up.


The track day at Keevil started well with over a third of the cars on the day being 7s.  The atmosphere was excellent all day with lots of sharing of tools, banter, cars and ideas.

After a wet drive to Keevil, the skies cleared and the morning sessions were dry.  Over lunch wind followed by a big black cloud brought rain then hale, luckily I'd managed to get the rain cover on the car in advance of it arriving.  On the plus side the queue for the burger van rapidly disappeared.


The first session on the track in the afternoon was very entertaining but the track quickly dried out before another shower came through and the sessions stopped and restarted and cars spun or had to be recovered.

The changes to the car were all a success, no problems with the front brakes and the stopping power was good all day with plenty of feel.  Quick rack gave a much sharper feel to the steering although I need to re-centre it by about a spline and the front ARB (not forgetting the whiskers) seemed to give a better feel to the front of the car without introducing any under steer.

Tuesday, 27 August 2013

Whiskers & Messing with the fuel Map

When I did the gelcoat repairs to the nose after removing the standard front indicator stalks I wasn't 100% happy with the finish.  There were very small bubbles at the surface that wouldn't polish out that filled with polish leaving white spots that then needed further polishing but few people noticed without me pointing them out and I fancied fitting Caterham Whiskers (or Canards) in the future.  Having searched for the Whiskers I could only find them for sale with Demon Tweeks or direct from Caterham at around £80 a pair which was a little too much, even with my inability to resist temptation, so they were put on hold.  I looked again at Stoneleigh and Aerodynamix said they might be doing them in the future so I spent my (non-SWMBO traceable) cash on replacement carbon fibre wing mirrors. After my first track day and some hot running I was looking around for ways to reduce the temperate of the air under the bonnet that feeds the TBs by some form of ducting from one
of the bonnet vents when I got distracted and found these:


They arrived in the post today so I spent sometime in the garage trying to work out how & where to fit them - ended up like this.


Next on to the popping and banging on overrun, I'd exchanged emails with Troy at Northampton Motorsports to ensure that I had the TB setup correctly before I go for a rolling road remapping session. He advised that if there was insufficient fuelling at low load below ~3,500 rpm there wouldn't be a stoichiometric mix, hence it wouldn't ignite in the cylinder and would be pushed into the exhaust where it would collect and ignite hence the popping & banging.  The potential solutions were to either increase the MS/B setting or adjust the individual setting on the fuel map.  The MS/B route was the most straight forward but it worked as a single scaling factor it would affect the whole map increasing the fuelling. The fuel map changes were possible without a RR as it was only the low load elements that were being changed.  The screen print below shows the changes in the map in light blue, when the software is running you get a bulls eye graphic and indicators on the table that change colour with green indication that the map was in the right area.


Out on the road the changes were immediately obvious, once the car was warmed up there was almost no popping and only when decelerating from rpm than were greater than the changes that I'd made.  I now think I'll leave it until I can get to NMS possible early next year before the late spring/early summer.


Saturday, 24 August 2013

Devon Blat

One of the Dorset WSCCers, Colin, actually lives in Devon but travels 120 plus miles each month to attend the pub meet and is always first to attend track days and weekend trips - he's even become keen on sleeping under canvas after Stoneleigh 2013 - maybe not.

Anyway, Colin and his better half Pat invited all the Dorset WSCCers plus some of their Lotus and Westfield owning friends down to Dorset for a couple blats and a BBQ.  Some of the crew made a weekend of it and booked B&Bs but as my 3 teenage children needed to be parented Tricia and I were limited to the primary day on Saturday.  Unfortunately parenting duties expanded which meant that Tricia had to stay at home so I left at 07:50 to meet up with Malcolm, Dale, Brian and Mrs Brian at the Honiton services on the A30.  As it's only 2 months and 1 day since my myocardial infarction I declined the bacon roll enjoyed by the others and limited myself to a polystyrene cup of tea.  Once refreshed we headed off to Dawlish to fight with the Bank Holiday and Air Display traffic on our way to Colin's arriving just before 10:00.  Pat was manning the kettle and dispensed teas and coffees as the posse assembled on the drive - eventually 6 Westfields, a Lotus 7 and Elise.  After Pat had handed out the laminated pace notes (where's Tricia?) and the photographs, we headed off - Westfield style - to the fuel station! and then off to the greater Devon.

5 wise men and a Lotus 7
 A well planned blat with a mixture of A, B roads and dual carriage ways saw us heading North then West skirting Dartmoor National Park before arriving at Tavistock for Lunch and the Cheese Festival.
Not high speed dodging vans


Once refreshed, fresh crab sandwich and Devon ice cream for me, we headed East through the middle of Dartmoor.


The line up
Then South back towards Dawlish.  Unfortunately I had to get back to Yeovil so headed East when we got back to the A380.  Hopefully the BBQ will be a success and tomorrows blat will equal todays.

Many thanks to Colin & Pat for organising today.  I covered over 200 very enjoyable miles


Saturday, 10 August 2013

Playing with the throttle body setup.......

I had trouble setting up the TBs when I built the car but drew stumps when I got the setup good enough to pass the IVA emission tests.

I've now driven 3,000 enjoyable miles in the car but have never been confident that the setup was right.  My concerns are: 1) lots of popping/banging when de-accelerating especially in 3rd or 4th gear. 2) Judder when in 4th or 5th gear when driving through 30 mph zones with no throttle - clears when accelerator is used but requires running in 3rd gear to stay in the speed limit. 3) The idle appears to be slightly high at ~1,000 rpm when the ECU was set to 900 rpm

When I setup the car originally I set the TBs at 4.5 kg/h having closed all the idle by-pass screws but the left hand inner TB which was 1/2 a turn open as advised by Guy at Omex as the starting position.  Once I'd got the TB balance the TPS reading was 11 and Throttle Max 195 so I set these in the ECU calibration.  Guy at Omex said that 11 was too low and suggested that I should adjust the TPS to give an idle reading of ~20 but having achieved the IVA emissions requirement I wasn't prepared to do anymore.  Mark at Westfield also suggested that the problem with the driving in 30 mph zones might be associated with the ECU switching off the fuel and that he sets the factory cars at 4.0 kg/hr.  In addition, Terryathome's video suggested that all the by-pass screws should be closed as the starting point for balancing the TB.

I followed T@H's initial setup and balance the TB's at 4.0 kg/h.  Once I'd done this the TPS was still reading 11 so I adjusted the TPS until it read 21.  I then set the ECU calibration file to the new idle of 21 and Throttle Max of 200.

And the results........mixed.....the judder has gone and the car is much nicer to drive through town, the popping/banging when de-accelerating appears much reduced but has not gone completely and the idle is now around 900 rpm so all three of my issues have been solved or improved.  However, I've also noticed that the car is now slightly hesitant when accelerating from lowish revs in 3rd and 4th gear, less of a problem than the previous issues but not ideal.

Time for a trip the NMS, so I need to start saving my pennies.......................

Tuesday, 30 July 2013

In Brugge...sans Mud Flaps!

A last minute change to the children's plans meant that they needed dropping off on Saturday morning not Friday and hence our planned cross country A Road drive turned into a motorway trash to get to the Chunnel.  Everything went well until the M25 which was closed between Junctions 10 & 8 to allow an incident to be cleared.  Whilst waiting to get off the motorway at J10 a passing motorcyclist alerted me to the fact that my n/s mud flap had started to depart company with the cycle wing.  I quick check confirmed that the bonding on one of the big heads had given way so, as a precautionary measure, I took my Gerber to the rest and removed both mud flaps, ~110 mile so not a good start.


Then things got better, the Highways Agency decided not to close the M25, only the inner two lanes, by this time we'd just made it to J10 so had a near clear motorway all the way to the Chunnel Terminal.  Once we'd arrived we parked the car to await our boarding call and went for a comfort break and bite to eat.


Loading on to the train was straight forward with the Westfield being directed to the lower deck and no clearance issues getting on or driving through the train.


After a 35 min crossing we were in France filling up at the petrol station just by the exit to the Chunnel before heading across the top of France/Belgium to Brugge.  The drive through Brugge over cobbled streets avoiding pedestrians and cyclists was interesting and even with a Sat Nav it took us two goes to find the Hotel Jan Brito through the web of one way streets (that cyclists can go both ways!)


Two very enjoyable days drinking beer, eating fish, mussels, frites etc, a small music festival and walking all in glorious sunshine.


The journey home started with the recovery of the Westfield from the underground car park and trying to repack everything plus the beer, wine and biscuits we'd bought followed by a return trip to the Chunnel.  After a couple of brief intervals of very light rain we took the opportunity of a refuel stop to fit the 1/2 hood which proved to have been a good call as we went through a shower in the last couple of miles before reaching the terminal. 

The weather in the UK looked okay so off with the 1/2 hood and, with plenty of time, we turned off the M20 as quickly as we could and head cross country through Kent (A28), Sussex (A265) and Hampshire (A272) before  skirting around Winchester and joining the A303 for the final run to Yeovil.  The IVA trim from the n/s cycle wing started to detach itself just as we approached Stonehenge, a quick repair with duct tape kept us on the road. As we approach Chicklade the sky became very black and we could see the rain so we looked for somewhere to pullover and fit the 1/2 hood - predictably this was about 1 mile too far and we ended up getting soaked fitting it, the car was reasonable dry as the majority of the time was fitting and tightening the straps and pop studs with only Tricia & I exposed to the elements.  The rain was so heavy that our feet go soaked with water coming through under the scuttle so at the next opportunity I'll remove it and work out a better way of sealing it!

All in all a very enjoyable 3 days with the Westfield driving over 600 miles in the process, the car now having covered 2875 miles, roll on Classic Le Mans next Jul.  I also need to sort out a storage area on the Roll Bar that allows access to the fuel filler cap.

Friday, 26 July 2013

Mudflaps Finally Fitted!

Rain is forecast for the weekend so, as we're heading off to Belgium, I decided that is was time to fit the mud flaps to the cycle wing.  I'd been putting it off because the weather had been perfect for blatting and, having gone to all the trouble to attach the cycle wings with hidden bolts, I wanted to use hidden mounts for the mud flaps.

After removing the wheels for access I cleaned and keyed the lower inner lip of the cycle wings using alcohol wipes to remove any final road residues.  I then bonded 2 x stainless steel big head captured M6 nuts to each cycle wing with plastic epoxy and left them overnight.

First thing this morning I cut the 4mm mud flap material to size and marked up and cut out holes for the M6 nuts. Finally the mud flaps were fitted using stainless 6mm repair washers and M6 bolts that I'd trimmed to length.

While the car was on axle stands I trimmed ~6mm off the seat bolt to hopefully stop the occasional bottoming out.


After a quick blat to make sure that the mud flaps weren't rubbing I filled the car on the way home and then started to pack ready for the trip to Belgium tomorrow.

Hi Vis jackets x 2, Alcohol Breath Testers x 2, Fire Extinguisher, Warning Triangle, tool kit and basic spares pack etc.  I also did a trial fit of Tricia's overnight bag and, after some adjustment, the boot lid fitted!


Zetec, Zetec, XE, Zetec


On Monday the Dorset WSCCer's went for a track day at Keevil, 7 Westfields plus a couple of non-Westfield attended.  Weather was perfect, slightly cooler than recently but stayed dry all day.


Cosworth


Plus the ST220 "Beast" and another beautifully painted in Gulf colours.

I left at ~15:30 so missed out on the beers on the way home......


Also found a video of the Dorset WSCCers leaving Stoneleigh on Youtube http://www.youtube.com/watch?v=a-6NfvvkQwI


Wednesday, 24 July 2013

Front In-Board ARB Pt2

One step forward - two steps back............. My decision to not bleed the brakes turned out to be a good one.  As I progressed the ARB installation it be came clear that the re-routing of the rigid brake lines wasn't enough so both sides had to be disconnected and re-routed, at least with the ARB in place I could see exactly where they needed to be.


When fitting the down link it was very close to the upper wishbone and looking at the build manual the design had the headlight mounting bracket which would get greater clearance.  I stripped down the bell cranks and the front upper wishbone mounts and packed them out with two extra washers and this gave additional clearance.  Next was a re-bleed of the brakes with James' help.


With the wheels refitted and the car ballasted with 85 kgs in the drivers seat I adjusted the downlinks to a neutral position with the bell cranks horizontal.  Then a run around all the nuts and bolts torqueing them up and tie-wrapping everything back in place followed by finally refilling the cooling system.


I couldn't resist a final gratuitous photo of the calliper and disc.


Monday, 15 July 2013

Front In-board ARB, Discs & Pads Upgrades

There's a possibility that I'll be doing anther track day at Keevil in the near future so after the success of the ARP Con Rod bolts I decided to fit the front ARB, drilled/slotted front discs and Mintex M1144 pads.
 
Front in-board ARB
 
First thing was to loosen the front wheel bolts, jack up an axle stand the front on the car and remove the front wheels.  Next disconnect the battery, front lights and remove the bonnet for better access.

Step one, disconnect the rigid brake lines and re-route them, including bending the chassis mounts, to avoid the ARB mounts.


Step two, drain the cooling system and disconnect the by-pass hose.  Bend the rigid cooling pipe, again to avoid the ARB mount.
Then loosen all the silicone hoses and adjust to line everything up again.


Step three, remove both the front shock absorbers/springs and refit then upside down and
including the lower ARB connection to the lower mount.


Step four, fit the ARB - lots of scratching of head and trial fits to work out how to get it in position but eventually found away.

 
Step five, phone up Westfield and order another set of 7/16 x 3.75" UNF bolts for the front upper wishbone mount.......hopefully they'll be in the post this afternoon and arrive by tomorrow.


Front Discs and Pads


By this time James had joined me so we decided that he would change the n/s disc/pads as I changed the o/s.  A straight forward job, remove the calliper, remove the hub grease cap, remove the split pin, remove

the hub (carefully putting the taper bearings to one side). bend back the disc bolt head locking tabs, remove the bolts and disc.  Re-assembly the reverse but torqueing disc bolts before setting the locking tabs and adjusting the hub crown bolt so that the hub turned easily but without any play, fit a new split pin.


With the callipers unbolted we remove the old pads, reset the pistons, fitted the anti-squeal pads/springs/copper slip then fitted the new pads.  Cleaned ad copper slipped the dowel pins then re-installed the callipers and torqued the bolts
 
Thought about bleeding the brakes but decided to wait until completing the  ARB just in case the rigid brake lines required further adjustment.