Saturday, 29 September 2012

Pre-IVA Build Finished

While I was in the US a replacement Synchrometer and the front grill arrived in the post.  Unfortunately, whilst I landed at LHR T5 on Tuesday afternoon I'd then had to travel up to Bristol on Wed/Thurs and by Friday all I wanted to do was drink cider and watch the Saints (beat Wasps).  Saturday started with shopping and children taxiing so I didn't get to the garage until 11:00.


First task was to warm up the engine and try to set up the Throttle Bodies with the new synchrometer - success.  I followed the instructions provided by Guy at Omex and also re-watched terryathome's youtube video http://www.youtube.com/watch?v=2qmJTYr47yY&feature=plcp and initially was a little concerned because although the reading was in single figures it was still nearly twice the 4-5 kg/hr I was supposed to set the induction to.  However, I cracked on and adjusted the idle screw whilst measuring the 2nd intake - I had to reduce the screw setting quite away but as I did the idle improved and I achieved the 4-5 kg/hr required.  By this time the TPS was reading 11, not the ~20 that I'd been told to expect and had originally set the idle to! Next I adjusted the inter-TB screw whilst measuring in take 3 until it matched intake 2 then adjusted the idle by-pass screws for intakes 1 & 4 until all read the same.  (based on this video Spielberg won't have to worry about me as competition)

By now the idle was much better and there were no nasty pops/crackles at idle - success.  I'm also confident that this will have resolved the emissions MoT failure as the adjustments have effectively reduced the air and increased the fuel which is what I needed to do.

Next I refitted the dash and steering wheel and went for a couple of runs up an down the drive to confirm that the speedo sensor wiring and all appeared okay, although @75m there wasn't enough time to confirm accuracy.  Tricia even came out and had her first drive of the car - need to make sure she doesn't get too confident and take over......


Back to the work, Myles and I fitted all the IVA covers to the front suspension, bonnet clips and windscreen pillars.  We used self amalgamating tape to hold the shock and upper wishbone covers - I need to check this is okay. Note: It's not (only classed as a temporary repair) so I replaced with the right size upper WB covers and removed the shocks to fit the covers - however, Bristol Centre inspectors were happy that the shock collet is in the exempt area.


Under the dash I fitted the inner panels, drilling out and replacing one of the side panel rivet and then one more at the front edge.


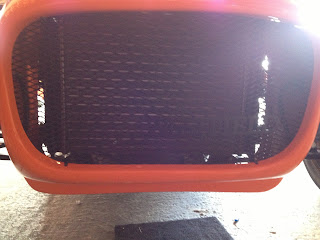
Then drilled 4 holes in the nose to fit the grill


The final task of the build was to fix the lambda sensor cable with a p-clip.  Again I drilled out an existing rivet and refitted it with the clip.

Build now finished and I'm ready for the IVA on the 10 Oct 12.  I'll take the car down to Quedam Tyres next Saturday to confirm that the emissions are okay and reset the head lights and Brendan has offered to come over and to a trial load to the trailer so there will be no problems on IVA day.

2 hours for me and 1/2 hr each for James & Myles - total build & rectification time to date 232 hrs.

Tuesday, 18 September 2012

Speedo fixed

Myles and I picked up the car from the garage after having it's wheel alignment "MoT retest" and drove home on a slightly longer route to avoid the early evening traffic - twisty country roads and very enjoyable despite the pop pop on throttle off and rattle from the exhaust.  Thanks very much to the guys at Quedam Tyres, Yeovil for doing the alignment - a bunch of real petrol heads who were willing to ballast the car and spend just over a day getting the set up done - I don't think they want to see another WF for a while though!!

Mark Walker from WF provided us the correct wiring for the speedo sensor (and Paul in the IofM confirmed that it was how he & Joe had wired their's):

sensor blue wire > earth
sensor black wire > speedo yellow wire
sensor brown wire > speedo red wire and then > chassis loom green (ign switched power)
speedo green wire not used so insulated with heat shrink

Once we'd done this (and moved the sensor slightly) a spin of the wheel made the speedo needle move up to 10 mph so very happy.

I'm now off the the US for a week and hopefully when I get back the replacement synchrometer will have arrived and I can focus on getting the throttle bodies set up and fitting the covers kit for the IVA on 10 Oct 12.  The guys at Quedam Tyres have offered to re-do the emission tests and head light alignment test just before I head off to Bristol, they also suggested a local (ish) engine specialist who might be able to help with the TB set up.

1.5 hours to re wire the sensor and test the speedo - total build/rectification time now 229 hours

Monday, 17 September 2012

Suspension set up

Car is away having an "MoT retest" and it's suspension set up but the drive down to the garage confirmed that I still have to sort out the speedo although the engine was idling much better.  The synchrometer has gone back to the supplier and they have agreed to send a replacement.

Saturday, 15 September 2012

Alternator change

The alternator arrived first thing this morning with 2 replacement headlight bulbs after finishing my morning/early afternoon children's taxi service I managed to get into the garage by 14:30.


The first task was to replace the alternator - straight forward enough, disconnect the battery, undo 3 bolts and 3 (2+1) wires and then the reverse to refit - access could have been easier but after one hour the job was complete and the ignition lamp illuminated at the 2nd ignition switch position and then went out after engine start; I measured the engine voltage at 13.97V so the battery is now charging.


I then replace the faulty head light bulb, re-wired the n/s head light and refitted it.  Unfortunately once again the bolt slipped around as I tried to finally tighten it.  After removing the main lens and bezel I could see that the tang that I had straightened out yesterday had bend again so I bend it back in place and tried again - after a bit of fiddling I managed to get the tang  in to place so it locked the bolt - the problem seems to be that in order to get the head lights aligned it's pointing too far down and the tang is at the end of/beyond it's effective range.  I looked at the o/s and this was the same so I repositioned it and made sure the tang was engaged.  Tomorrow I'll clear out the end of the garage wall and mark on where the beams should shine and get them set as best I can before going back to the garage.


I checked the fuel tank and there was a very small weep, much less than before, so I tightened the union another half a turn and will look at it again tomorrow.

I exchanged emails with the synchrometer supplier and they have agreed to replace it so I packed it up and dropped into the Post Office whilst on a taxi run this morning.  Hopefully when I get back from the US on the 25 Sept I should be in a position to try setting up the throttle bodies again.

2.5 hours today - total build time now 227.5 hrs

Thursday, 13 September 2012

Head Lights problem solved

Today's priority was getting my day car MoT'd and spending some time with Tricia as it was the last day of my holiday.  The Clio passed it's MoT with no problems, it needed new wiper blades but I had pre-ordered them to be fitted so that was the morning gone.  Tricia and I went into Yeovil looking for shoes and a hand bag - for her obviously - and then went to a small bistro called Mulberry's for lunch which was very acceptable but left me not wanting to do anything in the afternoon.
BAD Bulb
 Whilst not in the best humour for fault finding I eventually got into the garage and started on the head lights - 2 problems - n/s beam shape and the inability to fully tighten them up.  I removed the n/s head light unit and took it apart the tightening problem seemed to be related to a tang that's welded inside the unit that should lock the hollow bolt in place but wasn't so I bent this back into place.  With no obvious problem with the lens I removed the bulb and compared it to the o/s - and they were different. 

GOOD Bulb
From what I saw yesterday the angle that the bulb  was askew broadly equated to the angle that the beam was from the horizontal so I'm confident that this is the cause of the problem - I'll fit a  replacement bulb before taking the car back to the garage for it's suspension set up and ask them to confirm and readjust the head lights again.


Pleased with this first success I decided to look at the speedo to try and solve why it didn't show any speed.  First I checked the sensor, it was slightly too close so I set it to 3mm with is the middle of the tolerance band, testing will have to wait until Saturday.

Now on to the emissions, I'd emailed Mark at WF with a scanned copy of the test results over night so called for his advice.  He believes that the engine is running too lean and suggested that I go through the set up routine again to confirm nothing had moved.  Whilst the hot idle was now reasonable okay the cold idle is very rough and still cuts out unless the engine is rev'd.  Mark suggested I set the overall idle higher to give the Omex more room to make it's idle adjustments.  I went through the routine again but I wasn't confident that I was making any difference and without a synchrometer that I can trust I can't give accurate feedback to Mark.  My synchrometer is now packed up ready to be posted to Mark for him to compare it with the ones in the factory and remark the 4 and 5 kg/hr which is the range that the TBs should be set at.
How not to wire the speedo sensor!
I also discussed the exhaust and steering column rattles with Mark and he said that the factory used lithium grease before installation and that the exhaust shield was the most likely source of the rattle.  I also needed to investigate a problem with the top UJ bolt so I decided to grease up steering column.  On removing the UJ bolt I found that the nut had stripped it's threads so I replaced it however having removed the dash I discovered the speedo sensor earth wire had become detached so I soldered it back on and covered it with heat shrink to provide it with more support.


While I had the dash removed I attempted to tidy up the wiring loom ready to ty-wrap it to the dash support tube once I'm happy everything is working.

Mark also confirmed that my replacement alternator was being shipped today and he'd include a replacement head light bulb, so no need for me to trek down to Halfords tonight.  Hopefully Adrian will also include the front grill and then the car will be fully complete.

2.5 hrs today - total build time now 225 hrs

Note: see post dated 18 Sep 12 for the correct speedo sensor wiring


Wednesday, 12 September 2012

Pre-IVA MoT


The MoT achieved it's aim, in that it picked up a couple of things that I couldn't have done at home - Lambda emissions too high and, a really strange one, the n/s head light had the wrong shaped beam.  It should be level then divert up to the n/s but it was V shaped.  It has all the same markings as the o/s and is a sealed unit so I'm slightly bemused. 

There were a couple of other items:  Wipers & Washer failed - I'd been using them on the way there so was surprised but the fuse had blown.
Fuel was leaking from the return coupling at the front of the tank.
Front n/s wheel wasn't fully torqued up - oops
In addition to the V beam, the n/s Head light couldn't be fully tightened to hold position.

Just to make my day the multiple starts and lack of a working alternator meant I needs a battery booster to get the car started for the drive home between rain showers.

On the way there I also noticed that the speedo wasn't working, I assume the most likely cause is that the sensor isn't close enough so I'll look at it in the morning.
I've already fixed: (1) the wash/wipe (although one of the blades is very poor and leaves strips on the screen), (2) wheel torque and fingers crossed (3) the fuel leak. The head light looks like you have to press down/pull up on the head light as you tighten because the bolt spins inside the head light.

Luckily I've got a month to sort everything out before the IVA.  With all the messing about there wasn't time to do the wheel alignment so it's booked back in for Saturday and they're going to keep it for a couple of days to give themselves a good run at it.  They did set up the kit and check it and said that it wasn't too bad as nothing was wildly out but every wheel needed some adjustment!!!!!


Tuesday, 11 September 2012

More finishing off

I only managed two hours today just clearing off the final items on the "to-do" list ready for the pre-IVA MoT tomorrow.  First thing was fitting the tax disc holder - rather expensive even with a significant discount - but it should at least slow down someone taking the disc. Note: the disc holder failed the IVA edges test so I had to remove it during the IVA to pass - wait and fit it later


Next was fitting the pedal box cover - I'd removed the carbon fibre wrap as it was starting to lift and didn't look good.  I've ordered some 3M wrap and may try again.  I fitted the cover with M5 rivnuts into the chassis and self tappers into the scuttle and I put 2mm x 10mm neoprene foam around the end to ensure a good seal.


Mark at WF advised that the Westfield/Hi-spec calipers needed the pad dowels cutting down to ~5mm so I got out the dremel and used the cutting disc to achieve it without removing the dowel/pads. After a small slip I used an off cut of ali sheet to protect the caliper.


Given the many electronic gadgets I need to keep charged (mobile, sat nav, ipod etc) I bought a pair of 12V power sockets already mounted on a plastic bracket.  I installed this with a couple of self tappers and took the power from the aux connector on the chassis loom so the power will not need the ignition switch in the I or II position.


Final task was to tidy up the dash wiring and fit the protector around the edge of the scuttle and dash.  At first I couldn't get the passenger side mounting screws covered but after some adjustments I managed to get the lower one covered but the one on the radius remained visible so I painted it black for now.

The final job of the day was to fit the number plates to test the MoT-ability of a stick on front plate.  I fitted the rear plate without the black  "IVA area" plate but drilled it so that I can fit it in the same mounting holes before the IVA.


Total build time 220 hrs.......

Monday, 10 September 2012

1st "Blat" - only down the drive

Mr Postie delivered the upper steering column at lunchtime and thus I was released from "other duties" by Tricia.  Installation of the steering column was straight forward until I got to the electrics - the +12V and the Ignition were oppositely wired between the chassis loom and the ignition switch.  After consulting the wiring scheme confirmed it was the ignition switch that was incorrect and after a quick call to Mark at WF to confirm I swapped the pins over and reconnected.  Note:  The 1st switch position is not used with instruments etc being at position 2.
Unfortunately it began to rain thus no chance of a drive.  While I was on the phone to Mark we discussed the IVA and he advised to fit the  covers to the front shock absorbers - the IVA manual suggests that the area inside the wishbones is excluded from the sharp edges but recent guidance allows examiners to use their gauges. Rather than strip down the suspension I proposed using self-amalgamating tape but Mark said this could be deemed "temporary".  I queried the Westfield/Hi-spec pad pins and Mark said the have to be cut down to 5mm max - Hi-spec had changed the pins without telling WF, so 2 new items added to the "to-do" list. I'd also noticed that the ignition indicator, which I'd noticed flashing on when the engine was rev'd yesterday, wasn't coming on - got the multi-meter out and the power was at the indicator so another call to Mark and he confirmed it was an alternative diode so he's posting out a replacement that should be with me on Wednesday.  I'd put some more fuel in the tank but there was no reading on the gauge so I removed the boot and swapped the wires over and now all is well. By now the weather had cleared up and the drive dried out so I took the opportunity for a quick blat down the drive with Myles who got home from school.


The "run" was repeated 3 more times as various members of the family arrived home. The brakes worked well but need a good bedding in and there's is a ticking sound coming from the exhaust that needs further investigation.  I have the car booked in to a local garage for an MoT and 4 wheel alignment on Wednesday so I'll progress the "to-do" list tomorrow.  Sorted out the insurance for the IVA in Oct and also got cover for the MoT on Wednesday.
3 more hours today so total now 218 hrs.

Saturday, 8 September 2012

Wheels back on and garage tidy


Not too much done today.  First task was to fit the new battery and modify the the top strap.


We started the engine and got it up to full temperature and then set up the Throttle Bodies.  The synchrometer was still over reading but we ignored this and just got the two internal TBs set the same by using the link bar adjuster and once this was done all the TBs were reading the same value so we then when through the idle set up routine.  It's been a painful month or so but I've now got a much better idea of how the Omex Software works to manage idle which might be helpful in the future.

We put the wheels back on to the car and took it outside the garage and set the rear ride height and also cleared out the garage and gave it a good sweep out. 


 Reversing back into the garage the car bottomed out and we determined that it was the rounded hoop below the gearbox so I then got out my concrete cutter and "modified" the garage floor to get some clearance.  I'll repaint in once I know that I've removed enough.

Now ready for next weeks deliveries!!!!

2 hours for James and I - Total build 215 hrs

Friday, 7 September 2012

Good News

I got a call from Adrian at WF today confirming that he was packing and shipping an Upper Steering Column today and that the Front Grill had been welded and was out for powder coating and should be with me mid next week.  I've got a couple of days off work next week that I booked for the original IVA date so, fingers crossed, I should have the car finished by Thursday.  If the Steering column doesn't arrive tomorrow I'll use the time clearing the garage and finishing off one or two minor jobs like fitting the new  ODYSSEY-EXTREME-RACING-25-LIGHTWEIGHT-DRYCELL-BATTERY that arrived on Tuesday.  I've also got to get the two family cars MoT'd in the next week or so so before I go to the US later in the month.